iOS Machine Learning with Core ML and Vision
tl;dr #
Sample different ML models using iOS and Core ML and Vision. Take a photo, or pick images from your photo library, and use pre-trained Core ML models to classify them. You’re only as good as your model! The source for this example can be found on [GitHub][1]. I’ve assumed working knowledge of iOS using Swift and Storyboards.
Core ML and Vision #
With Core ML and Vision, we use Vision to run image analysis requests against a trained Core ML model to attempt to classify scenes in images and videos. (This sample app covers image classification only – hoping to do a video classification app later too!) The classification result(s) provide a classification of the image/video. The classification is the confidence of the match against an object identifier e.g. a 22% certainty the image you just gave me is a box of cereal.
Sample app #
The app will
- allow image input via the camera, or the photo library
- Add a [trained model][2] from one of the object detection models. (Resnet50, InceptionV3, or VGG16). These models are compiled, and become available via Swift compiled classes.
- display its best classification on screen
- provision for device (via automatic signing)
New Project #
Create a Single View Universal app in Swift. As an optional step, modify your Main.storyboard to use safe area layout guides. Select Main.storyboard, and select the first tab on Utilities Pane. Check ‘Use Safe Area Layout Guides’ on. The safe area is a new layout guide in iOS 11, deprecating top and bottom layout guide usage in AutoLayout constraints, making autolayout a bit easier in iOS 11.

Your hierarchy will change from this:


Views now contain safe area guides – bind your AutoLayout constraints to this guide.
Privacy usage #
Add permission descriptions for camera and photo library usage in Info.plist, or she won’t run!

Storyboard #
I used a single view controller. Add these UI components:
- A centred UIImageView. 50% height proportion to its super view. I set its aspect ratio to 1:1 (square). Lastly, set its content to Aspect Fit. These changes allow for adjustment to orientation changes on the device.
- A UILabel result text label. Anchored vertically below the UIImageView, aligned to the leading and trailing edges of the UIImageView. Set its number of lines to 2, and align text to centre.
- Two tool bar buttons for camera input and photo library image selection. Align leading, trailing, bottom to the safe area guide.
- I added two sample images for quick testing in the simulator without picking any images. One of a cat, one of a monkey.

Save and run your app. Rotate the device – the image should center as expected, with an offset text below. It’ll work on both iPhone and iPad

Add the Core ML model #
Download a [trained model][2], and drag it into your project folder. Make sure to include it in your target or it won’t compile to a Swift model. I used Resnet50. Since ML models are compiled, you’ll need to make a code change too. To find the model name, select your .mlmodel file, and click through to the source.

You’ll find the model name pretty easily – it contains an MLModel instance variable.
@objc class VGG16:NSObject {
var model: MLModel
…
Code #
We’ll add code to
- Respond to camera input and image selection from photo library
- Configuration of the ML model, setting up Vision and making a classification request
- Display classification on-screen
Responding to camera/photo library input #
In ViewController, we implement UIImagePickerControllerDelegate for both picking and using the camera. Remember to wire them up to the toolbar button actions added in the storyboard.
    @IBAction func pickImageTapped(_ sender: UIBarButtonItem) {
        let pickImageController = UIImagePickerController()
        pickImageController.delegate = self
        pickImageController.sourceType = .savedPhotosAlbum
        present(pickImageController, animated: true)
    }

    @IBAction func cameraButtonTapped(_ sender: UIBarButtonItem) {
        let pickImageController = UIImagePickerController()
        pickImageController.delegate = self
        pickImageController.sourceType = .camera
        pickImageController.cameraCaptureMode = .photo
        present(pickImageController, animated: true)
    }
Now, add a reference outlet for the picked image and result label. Finally, wire them up from the storyboard too. Add protocol extensions for UIImagePickerControllerDelegate. It’ll respond to picked images from the library and camera.
@IBOutlet weak var pickedImageView: UIImageView!
@IBOutlet weak var resultLabel: UILabel!
// Class Extensions
// MARK: - UIImagePickerControllerDelegate
extension ViewController : UIImagePickerControllerDelegate {
    func imagePickerController(_ picker: UIImagePickerController, didFinishPickingMediaWithInfo info: [String : Any]) {
        dismiss(animated: true)
        guard let pickedImage = info[UIImagePickerControllerOriginalImage] as? UIImage else {
            print("pickedImage is nil")
            return
        }
        pickedImageView.image = pickedImage
    }
}

// MARK: - UINavigationControllerDelegate
extension ViewController: UINavigationControllerDelegate {
}
Image classification #
Once you have an image, its time to classify it! In ViewController, declare your model as a static iVar, or use it inline
let coreMLModel = Resnet50()
Now, add a method to classify an input image. This method will
- convert the input image to a CoreImage
- instantiate a Vision MLModel
- Create a Vision request (VNCoreMLRequest)
- When the request is performed, we’ll receive an (optional) array of observations, ordered by confidence
- Each observation has an identifier with a level of confidence
- Update the UI with the identifier with the highest confidence – its the model’s best guess!
- Invoke a VNImageRequestHandler to perform the classification request
    /// Classify this image using a pre-trained Core ML model
    ///
    /// - Parameter image: picked image
    func classifyImage(image: UIImage) {
       guard let ciImage = CIImage(image: image) else {
            print("could not continue - no CiImage constructed")
            return
        }
        resultLabel.text = "classifying..."
        guard let trainedModel = try? VNCoreMLModel(for: coreMLModel.model) else {
            print("can't load ML model")
            return
        }
        let classificationRequest = VNCoreMLRequest(model: trainedModel) { [weak self] classificationRequest, error in
            guard let results = classificationRequest.results as? [VNClassificationObservation],
                let firstResult = results.first else {
                    print("unexpected result type from VNCoreMLRequest")
                    return
            }
            //for debug purposes - print all the classification results as a confidence percentage
            print("classifications: \(results.count)")
            let classifications = results
                //                .filter({ $0.confidence > 0.001 })
                .map({ "\($0.identifier) \(String(format:"%.10f%%", Float($0.confidence)*100))" })
            print(classifications.joined(separator: "\n"))
            //display first result only as a percentage (highest classification)
            DispatchQueue.main.async { [weak self] in
                self?.resultLabel.text = "\(Int(firstResult.confidence * 100))% \(firstResult.identifier)"
            }
        }
        //perform an image request
        let imageRequestHandler = VNImageRequestHandler(ciImage: ciImage)
        DispatchQueue.global(qos: .userInteractive).async {
            do {
                try imageRequestHandler.perform([classificationRequest])
            } catch {
                print(error)
            }
        }
    }
Provision for device #
Since you’ll be running this on your phone/iPad, don’t forget to setup your device provisioning (Target..General..Signing). I used automatic provisioning.

xCode 9. Run on device #
With xCode 9, you can run wirelessly on device. Make sure your computer and iPhone/iPad are on the same wireless network, select ‘Window…Devices and Simulators’. Check ‘Connect via network’. I found its a bit slower to install than a tethered device, but super convenient!

Results #
Here were some of my results. More testing is definitely needed!

Models #
Try other Core ML models from Apple. When you add them to your project, add them to your project target. You’ll need to change the model name in code too.
The sample source code for this app is available on [GitHub][1].
xCode 9. Github improvements #
As part of xCode 9 – theres a better integration with Github. I added this source code to my Github account by
- Source Control…Create Git Repositories
- Add your credentials under Preferences..’Source Control Accounts’.
- Switch to the Source Control Browser Pane, and select the Settings icon

- Create ‘CoreMLDetection’ Remote on Github…’
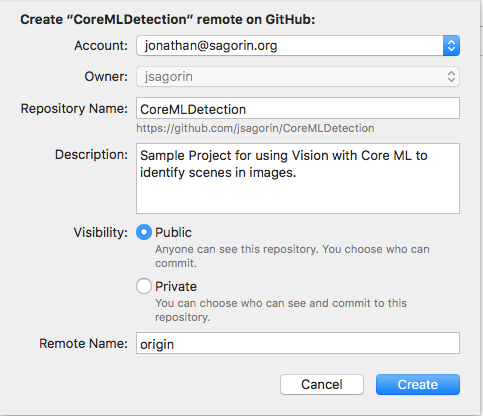

Seemed simple enough, but I’ll stick to the termianl window thank you very much!. It might be useful for tracking code changes, but I’m not sure yet.