Convert WordPress to a Hugo static website
TL;DR #
How to migrate your WordPress website to Hugo - a static site generator. Includes instructions on how to deploy to a cloud provider (on Linode)
Context #
I’ve used WordPress for many years to publish this blog, and its been mostly pretty easy to maintain. I deploy to Linode on a provisioned Linux server. I installed a firewall, and run regular software updates and upgrades to the server. I ran a free version of Wordfence on WordPress to notify me of security threats. With WordPress being a mainstream blogging solution, vulnerability attacks on Wordpress are a little too common.
Given the ongoing server maintenance and WordPress vulnerability concerns, I needed another solution. I looked into Jamstack using static site generation.
- No servers - just static HTML deployed to the cloud.
- Scalable, fast and very little maintenance needed.
- Costs are low too - hosting costs dropped to $5 USD or less a month. (Having said that, I was paying $7 a month for a server instance with Linode, which included server backup. At work we use AWS but for personal work, I use Linode. Linode is great - very well priced, simple to use, excellent technical resources and fast and friendly support.
- Really easy to deploy website changes
Given its adoption rate and speed, I went with Hugo as my static generator. I’ll higlight some of the work needed to migrate your Wordpress site to Hugo.
Migrate WordPress to Hugo #
Firstly, get familiar with Hugo. I worked my way through Mike Dane’s Static Site Generator Tutorial on YouTube, which was more than enough to get me going.
What’s needed? #
You’ll need to get your site working locally first, and then deploy to the cloud
Local setup #
WordPress plugin export #
(https://github.com/SchumacherFM/wordpress-to-hugo-exporter). Output is a zip file. Save it for later.
Setup local Hugo #
Install Hugo, and generate your base site. Follow the Quick Start guide on the Hugo website. Choose and install a theme. Some options on Hugo Themes, or Jamstack Hugo Themes. I went with Congo - I liked the simplicity of it. Allow your content to do the talking!
Import Content #
By default, all pages exported from Wordpress are exported as top-level pages, with all images in a `wp-content’ folder.
posts/my-blog-post-one.md
posts/my-blog-post-two.md
posts/my-blog-post-three.md
wp-content <- all uploaded images to WordPress
Structure your site content in folders under the Hugo content folder by section. I created a blog folder under content, and placed all my blog posts in there. You can choose to move wp-content with all your images into the static folder as is, and things should work.
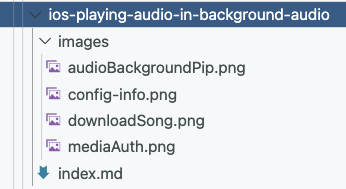
However, you can also use Hugo Page Bundles, which I chose to do. Eessentially, it’s a folder per blog page, with a top level index.md for the blog post. What’s nice is you can keep the images associated with that blog in the same folder.
As an example, this blog post has the following folder structure within /content/blog:

The folder name doesn’t have to be the URL for the page - you can control that within the front matter of the page. Here’s an example of the front matter from the above page:
---
title: iOS playing audio in the background
author: Jonathan
type: post
date: 2021-12-28T05:40:48+00:00
excerpt: Tips, tricks when playing background audio in an iOS app.
url: /ios-playing-audio-in-background-audio/
categories: ["howto", "iOS", "iPad", "iPhone"]
---
Menus can be setup within your Site Config file. Read this for more details.
Cleanup, checks and analytics #
- I chose to cleanup all my blog posts into folders describe above. I had to re-check all my image links in my content, but that didn’t take too long. When replacing image paths, I used Hugo’s Figure shortcode
- I chose to cleanup all my blog posts into folders describe above. I had to re-check all my image links in my content, but that didn’t take too long. When replacing image paths, I used Hugo’s Figure shortcode
- I removed unneccessary front matter tags generated by the plugin exporter.
- I installed my analytics tags. I added Google Analytics to my site config file:
googleAnalytics = "YOUR-WEB-PROPERTY-ID-HERE" - Check all pages marked with
draft:trueshould be draft pages - I checked I was happy with the sitmap generated by Hugo.
Test locally #
- Hugo. From command line, run
hugo server -Dfrom your project folder (-D includes draft content). Automatically reloads when content changes. Nice! - Apache (optional). I use this as a final test before deployment. It confirms the code generated by Hugo is correct. Check site is working by running it on a local Apache instance. (Read this if you’re on Mac Monterey)
This command removes the current genereated code in
publicfolder, re-genereates the site, and copies it to the Apache default location in my user home folder:rm -rf public && hugo && sudo cp -R public/* ~/Sites
Cloud setup #
I use Linode for personal use. The remainder of this post covers the Linode setup, but there are many options here.
AWS Setup #
If I were deploy Hugo to AWS, I would use the following architecture
- Route 53 entries for domain host records, pointing my domain to a Cloudfront distribution
- Cloudfront for caching and to serve HTTPS traffic. Content is retrieved from S3
- S3 Bucket to host your static content
Some Tutorials to check out
- Tutorial: Configuring a static website on Amazon S3
- Speeding up your website with Amazon Cloudfront
- Configure CloudFront distribution to use an SSL/TLS Cert
Azure Setup #
An extensive tutorial on how to host a static website in Azure storage is available. Don’t forget to check out how to map a custom domain to Blob Storage to complete your solution. This includes HTTPS setup.
Linode Setup #
I use Linode for personal projects. I use AWS at work, but I highly recommend Linode in this case. Linode offers Linode Object Storage (LOS), which is equivalent to AWS S3.
What’s really nice is LOS supports installation of Custom SSL/TLS Certs, and its pretty easy to setup. You can upload a custom certificate directly to your Linode Object Storage Bucket.
Once you’ve generated and tested your site locally, you can pretty much follow this Linode tutorial for hosting your static Hugo site on Linode.
The remainder of this section summarises the steps I performed to get my site working on on Linode.
Create an Object Storage Bucket #
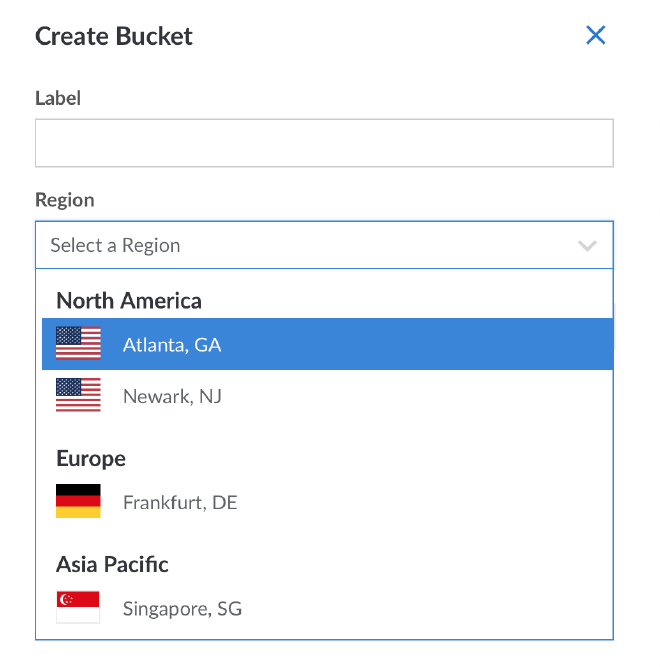
Once you’ve logged into Linode select ‘Object Storage’ from the menu…‘Create Bucket’. Select your region. Linode has 5 regions.

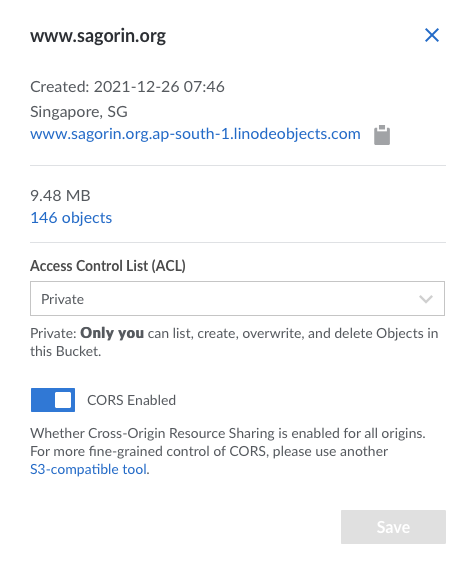
Your bucket name must match your website name. This step is important when installing an SSL certificate. So, my bucket is named www.sagorin.org, and is setup in Singapore. Closest to Australia, I chose Singapore.

Setup Access keys And Secrets #
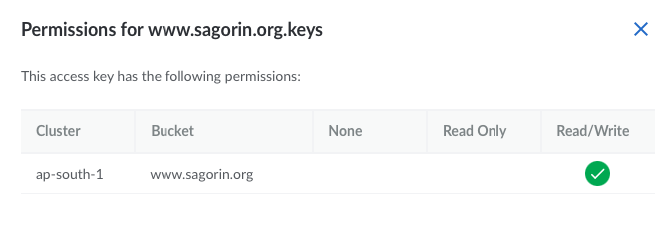
Create an access key and secret in your Cloud Provider. You’ll need these to upload your website content. In Linode, select ‘Access keys’ under Linode Cloud Manager…Object Storage.
I would sugggest limiting its access to the bucket you’ve just created.

Transferring files using s3cmd to s3 #
Whether you’re using AWS, Azure or Linode, you’ll need to setup a command line tool to upload your files to your cloud provider of choice. I use s3cmd, which supports any cloud provider who supports the s3 protocol.
To setup s3cmd to work with Linode, open a terminal window and type s3cmd --configure.
New settings:
  Access Key: YOUR-KEY-HERE
  Secret Key: YOUR-SECRET-HERE
  Default Region: US
  S3 Endpoint: ap-south-1.linodeobjects.com
  DNS-style bucket+hostname:port template for accessing a bucket: ap-south-1.linodeobjects.com
  Encryption password:
  Path to GPG program: /usr/local/bin/gpg
  Use HTTPS protocol: True
  HTTP Proxy server name:
  HTTP Proxy server port: 0
Once this is setup, configure the bucket as a website. You’ll need the s3 protocol name, which is just your bucket name:
s3cmd ws-create --ws-index=index.html --ws-error=404.html s3://www.sagorin.org
deleting a bucket #
If you need to start again, its pretty easy. Delete your bucket using this command:
s3cmd del s3://sagorinorg-hugo --recursive --force
get website info #
s3cmd ws-info s3://www.sagorin.org
returns:
Bucket s3://www.sagorin.org/: Website configuration
Website endpoint: http://www.sagorin.org.website-ap-south-1.linodeobjects.com/
Index document:   index.html
Error document:   404.html
SSL Certificates #
I use [NameCheap] (https://www.namecheap.com) for my domains and my certs. Great service, good prices. To enable HTTPS/TLS traffic, you’ll need an SSL certificate.
If you have your cert already, a complete Linode guide for enabling SSL on object storage from is available
Certificate setup on NameCheap #
I Here’s a quick summary of what you’ll need to do to setup an SSL cert on NameCheap
- purchase your SSL cert for your domain
- create a cert signing request. On Mac, I used
openSSL. Follow these NameCheap instructions.- artifacts: a CSR file, and a private key. Keep these safe
- activate the SSL Certificate using your CSR
- validate you own the domain via a DNS entry. You’ll receive an email confirmation when its active
- Download the certificate (.crt file) to your local computer
Installing the certificate on Linode #
Install the certificate on your hosting server (in this case, Linode Object Storage). You’ll need two files
- private key (created in during your cert signing request)
- Certifcate file (.crt file downloaded from NameCheap)
DNS Entry Validation #
Create a CNAME entry on your hosted DNS record. In AWS, this would be using Route 53. With Linode, its in their ‘Domains’ record on your account dns entry
NOTE: Linode Domain records WILL NOT work unless you have at least ONE running server instance configured on your A/AAA host record. I had removed my linux Wordpress instance from my Domain Record on Linode, and basically my DNS entry could not be found. Linode support confirmed the issue.
I moved my host record to my domain registrar. I think Linode has missed a great opportunity - provide a full service option for static sites - Domain DNS entries, SSL cert hosting, and object storage. Don’t make me configure host records somewhere else.
www.sagorin.org CNAME www.sagorin.org.website-ap-south-1.linodeobjects.com
Deploy your website #
From your project root folder, issue this command. You would’ve needed to have configured s3cmd.
s3cmd --no-mime-magic --acl-public --delete-removed --delete-after sync public/ s3://www.sagorin.org
Check your site is working as expected. Once you’re happy, check your site in Google Search console too.
Useful links #
Hugo #
Quick Start Page Bundles Congo - a Hugo Theme
Linode #
Host a static site on Linode Upload a Custom SSL/TLS Cert on Object Storage